Ender 3 Pro – Upgrades and 3D Printing – Makers and Tinkerers
I didn’t think 3D Additive Printing would really capture my attention or inner maker/tinkerer needs at all. Printers after all are just printers, a robot that prints text. BUT a 3D Printer really is a whole lot more which has gotten my attention.
You can bring 3D objects into reality.
Ender 3, and Ender 3 Pro require a lot of Love and iteration to get it near perfect. From learning about magic numbers, drying filament, properly tightening eccentric nuts and belts. The Ender 3 Pro does work to print out of the box. Even poorly setup Ender 3’s will print. You will just need to watch YouTube videos about it and learn as much as you can.
Proper tightening the Eccentric Nut’s on the Bed, Gantry and HotEnd Carrier are a Must! I had to learn the hard way after finding all 3 were loose and wiggled to much for a proper bed level to happen. You will still be able to print if these were missed on setup. YouTube could be your friend here with helpful guides on all things to tweak to get the Ender 3 Pro to perfect printing.
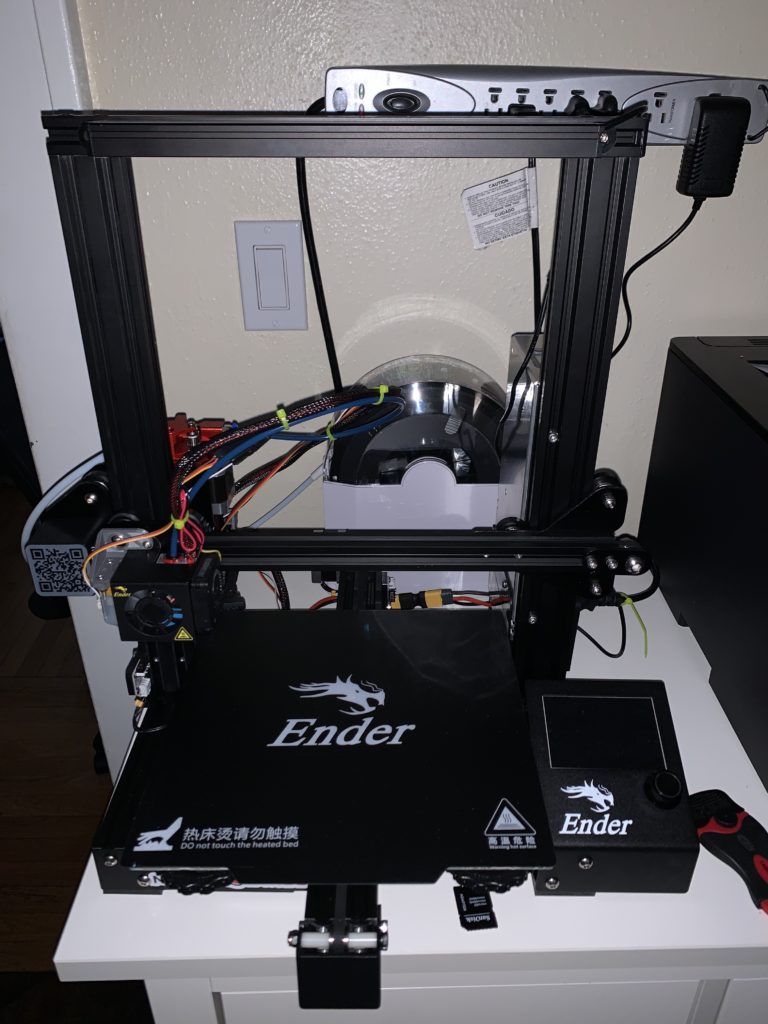
My Ender 3 Pro has gone from a stock machine to one that should be able and ready to print in PolyCarbonate, or Carbon Fiber filaments which need in excess of 300 C print temperatures.
- Micro Swiss Hot End
- SKR Mini E3 V1.2 for silence with the integrated TCM2209 Drivers, (includes the TFT 3.5)
- BLTouch Bed Leveling
- Marlin 2.0.5.3
Things left to upgrade
- Direct Drive Extruder for Flexible Filaments (Holding off on this for now)
- SKR V1.4 Pro board with TMC2209 drivers (Holding off on this for now)
- Higher Temperature thermistor. The stock one may not allow as high a temperature as suggested by a YouTube video. (More reading required)
Parts on their way
In some if not most of my prints I noticed a single line deviation which eventually corrects itself. I’m of a mind to iteratively fix this. After the BigTreeTech S42B’s I will look into replacing the belts with better belts. I just need belts that don’t add aberrations and I will continue in that stride till it is fixed.
The Closed loop drive control boards will be fitted to X and Y axis motors, which will then provide feedback on position and prevent skipped steps. I’ve done a few things to help prevent skipped steps only to see it continue. Tight and Clean belts for one. This leads me to think the motors may be a cause or the drivers not giving enough amps to drive them.
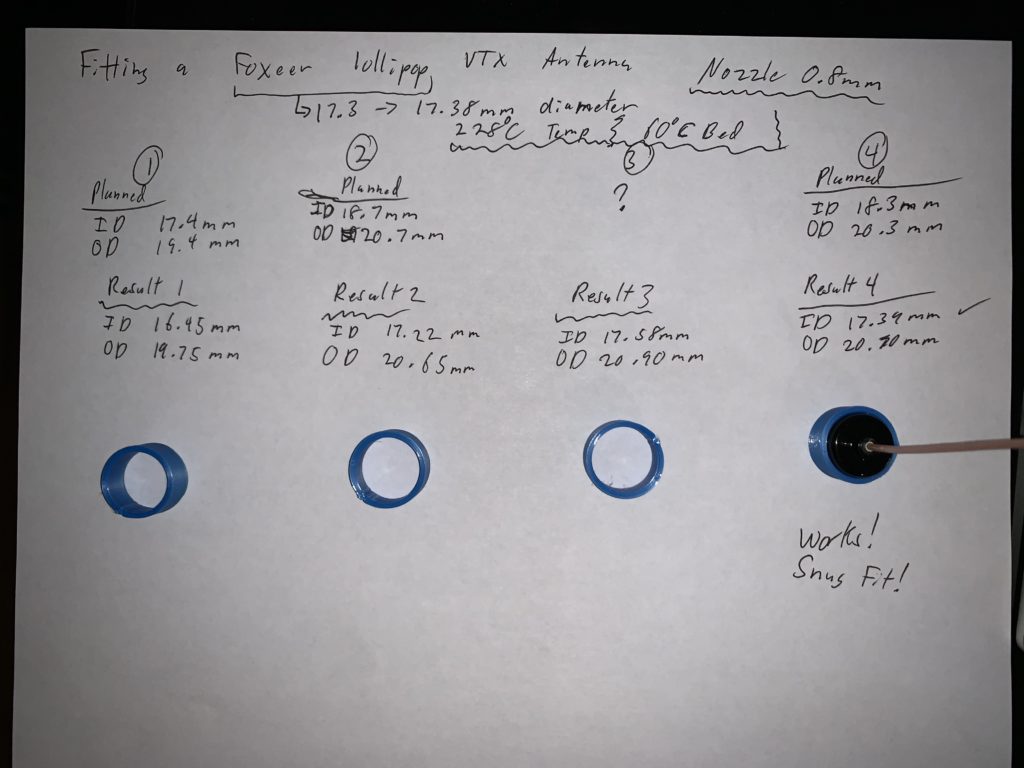
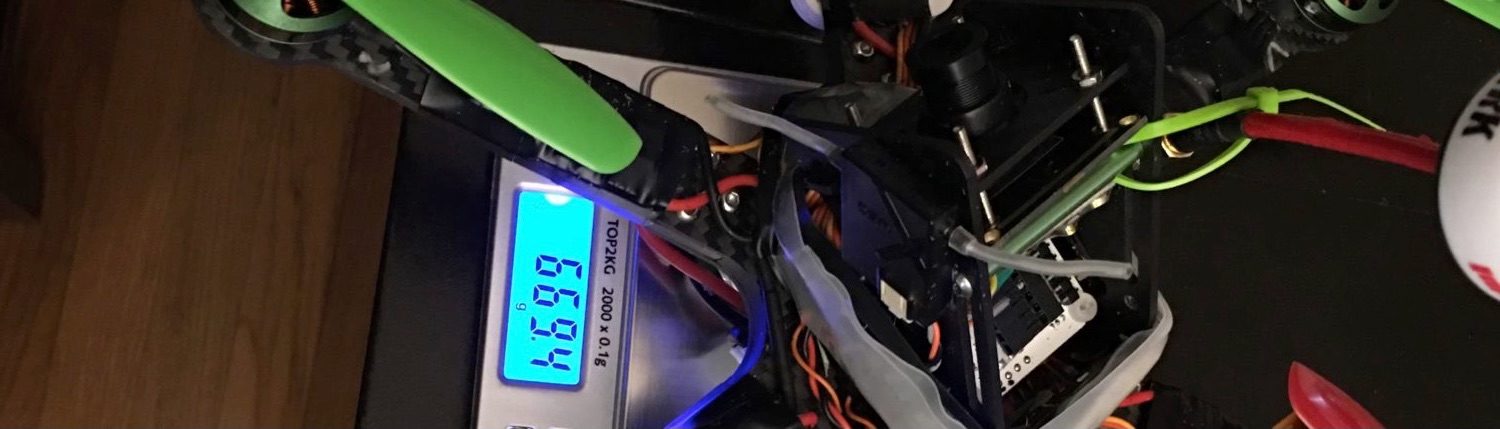
I used TinkerCad.com to work through and make this Ring which fits the Foxeer Lollipop Antenna as seen above. For approximately 17.4 mm of OD I needed to be 0.9 mm larger to fit the Antenna. The next stage is to attach it to a holder in TInkerCad for inclusion in drones.
I read through a lot of documents for the best reason why fitting a circle to the outer diameter of an object seems to fail and I couldn’t seem to find any good reasoning about this. Most makers size their inner diameter larger than the object to fit, which leads to iterations needed.
This could be a function of over extrusion, or alignments, wall thickness etc. I found that when printing the Lollipop ring, it wouldn’t let me do the multiple of the 0.8mm nozzle to a wall thickness of 1.6mm. Cura wanted to use 2.0 mm for the walls, otherwise, Cura wouldn’t slice the object and there was nothing to print.

When trying to print an entire ‘dual Post Linked to Antenna Holder‘ for a different sized AXII antenna, I had to do several iterations. This was using the 0.4mm nozzle. It is interesting that as a Software Programmer, to encounter Iteration everywhere in life.
Conclusions: The Ender 3 and Ender 3 Pro are fabulous for people who want to learn to build, tweak, and tune their printer. There is even a Core XY upgrade kit for the Ender 3. I think if you need near-perfect prints and to feed your maker/tinkering, An Ender 3 fits the bill.
3D printing has been a fun learning experience. This Ender 3 has been the correct path for me to delve into it. The DoBot Magician that had 3D print capabilities (perhaps) needs a heated bed, and proper leveling which a year ago I wasn’t good at. When I examine that route, I would spend as much $$ figuring out the Heated Bed purchase parts, a dual gear-driven extruder upgrade, and a better leveling solution to get the 3D printing to stick and work.
If you need perfect Engineering quality 3D Prints, go for a CoreXY printer. Buying the upgrade kit for the Ender 3 will be expensive, and you may get left with enough parts to build the base Ender 3 having two 3D printers (Maybe a few extra parts are needed like steppers and hot end), but you would be at an advantage with experience of full disassembly and re-assembly of a 3D printer and this is one step closer to you as a maker buying V Slot Aluminum, rails, stepper motors, and parts to build your own 3D printer. Which would be fun and is possible.
updated with affiliate links in May 8th 2021